Necessity is the mother of invention.
Sometimes a project comes along that forces one to expand his capabilities. This table definitely falls into that category.
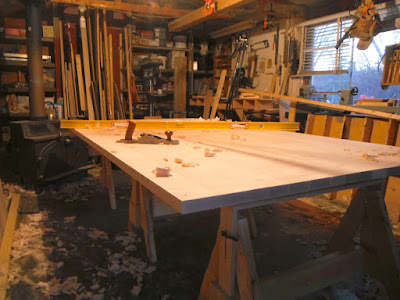
That's a big table. 5 feet wide by 9 feet long by 1 1/2 inches deep. Solid maple.
I laminated together two halves, then glued those halves together. The next problem is flattening such a thing. My current work table has some issues that won't allow me to do it.
It isn't big enough to support that top.
It's not quite sturdy enough, either. It was originally designed to be a portable table, and thus is equipped with folding legs. Folding legs have too much wiggle for what I am about to do.
Lastly it is too tall. It stands at 36", whereas I need about 24". See, in order to flatten this top I have to get on it with hand planes. Hand planing requires considerable weight, and because the top is 5 feet wide, and I have to keep my weight on it while reaching halfway across, I need to get it down lower.
So. It needs to be held up at 24", and it has to be sturdy.
Let's build some horses. Three of them, to be exact. One to support either end of the top, plus one more in the middle. Legs are cut and joints are lapped. Lapping offers a far superior joint than just a butt-joint.
A series of A-frames are assembled.
Now this is the interesting part. The top also needs to be held flat. It is pretty hard to flatten anything if it is sitting on an un-level surface. So I bought some nifty cam clamp mechanisms from
Lee Valley Tools. These are similar to the clamp on a bike seat that holds the height of a seat-post. Installing these allows me to adjust the top of each horse and make it level, even if the floor/ground is not.
These beauties will come in handy, and not just for this project.
Wait!
I have one more problem! How am I going to pick the top up, get the old work table out from underneath it, then set up the new horses underneath?
The top weighs over 200 lbs.
Aha!
I knew my Bachelor of Fine Arts would come in handy some day!
Look! The Backstage Handbook, from my 1st year of theatre school!
Page 99 has a very helpful list of rigging set-ups. The gun-stock purchase gives me a mechanical advantage of 2:1, with some loss on friction.
Up, up and away!
Now I can get to work. The top is planed first of all across the grain (called traversing). Then at a 45 degree angle to the grain. Then at the other 45 degree angle. And finally it is smoothed with the grain.
All told the planing took about 2 days.
More to come...


