"What's a pergola?"
I get that a lot. A pergola is...
Well it certainly isn't an arbour or a trellis. Sometimes these terms are used interchangeably but they are certainly not the same thing. An arbour is more like an archway or a gateway. A trellis is generally a wall or a panel that is used for shade or to grow things on. A pergola is also used for shade or to grow things on, but more on that later.
Anyway, let's make a pergola!

Here we are in sunny Medicine Hat, Alberta.
You can see here that the posts that hold the structure up have been placed, braced plumb, and lopped off at level. Beautiful landscaping was done by our friend Digger Dan.

Now to start on the first level. Pergolas generally have three levels of framing. The bottom level in this case consists of two beams that run from post to post, plus two cross beams that link the whole structure together. Pictures above is the bottom of the beams. They are about to be lapped to receive the posts.

Let the lapping begin! Gang the timbers together to make things easier. The circular saw is set to cut 1/2" deep.

Smash the remaining material out with a few hammer strokes.

Then clean the joints with a sharp chisel.

And now it's time for mortises!
The cross beams are are joined to the beams with big, fat through tenons. Pictured above is a template saddled to the beam.
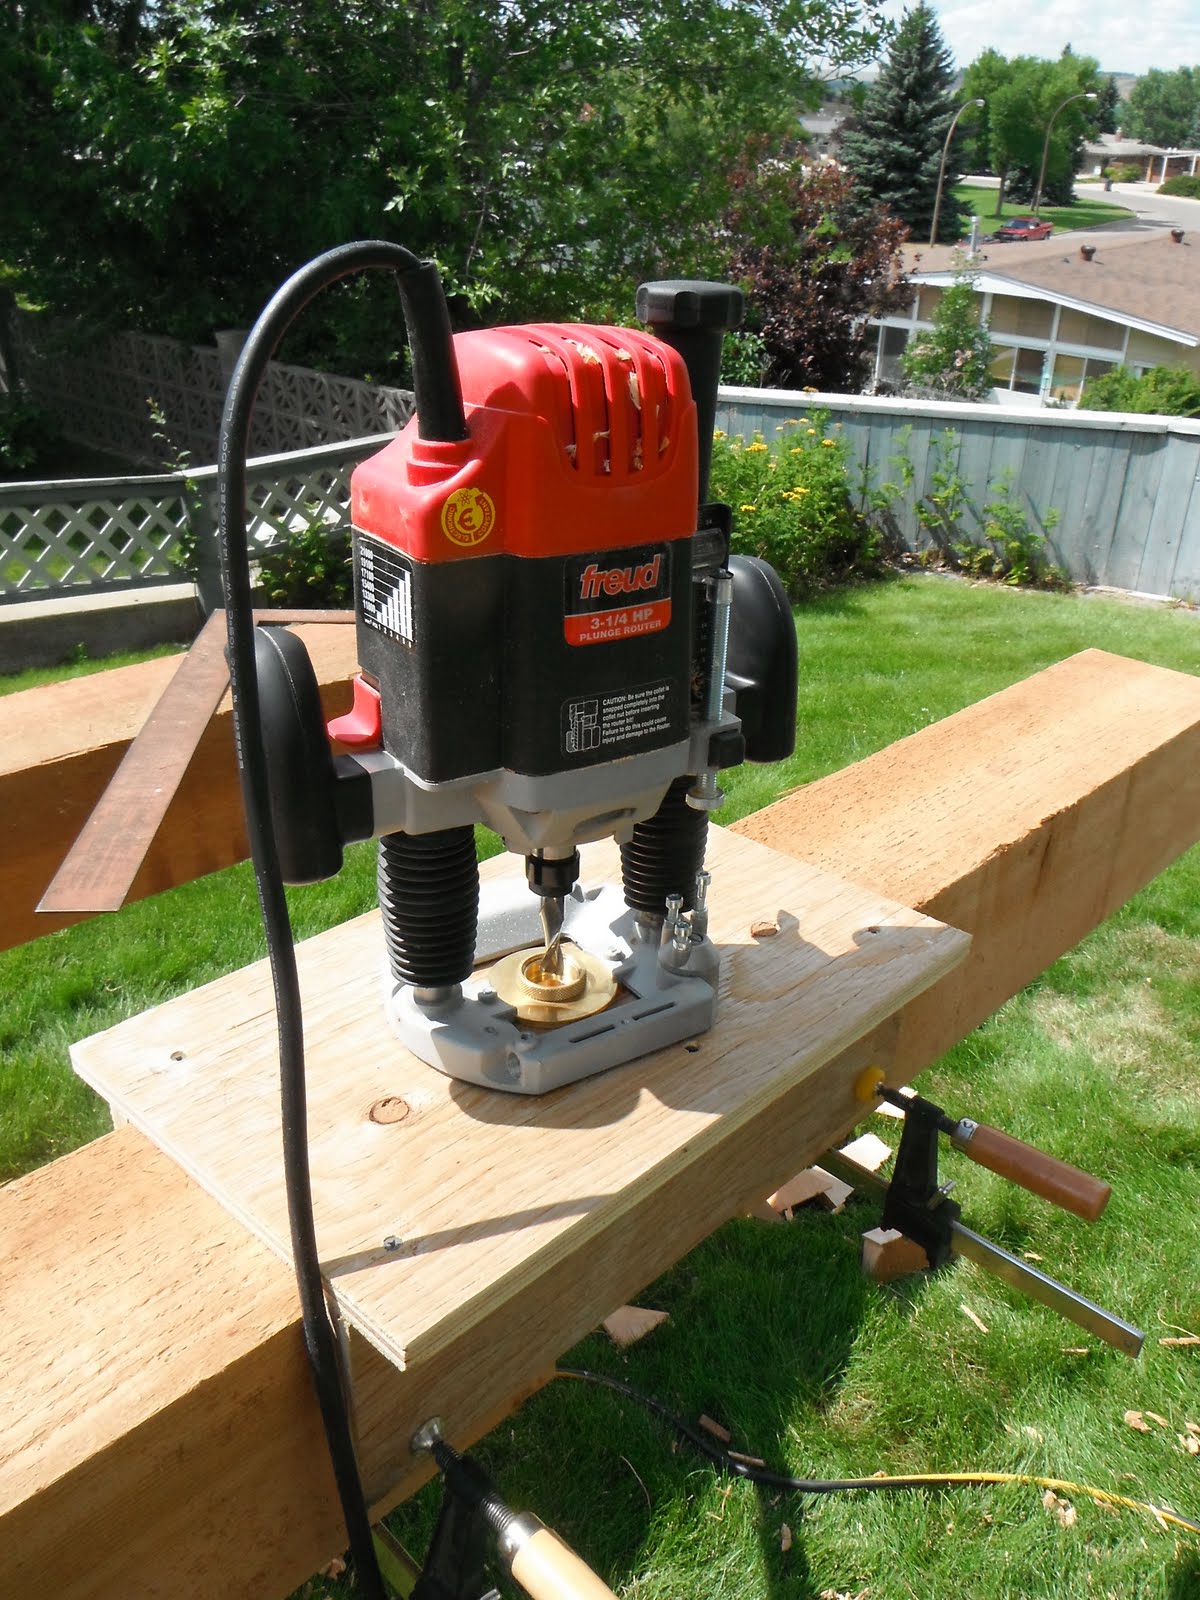
The router follows the template...

Voila! A square hole!
Not very deep, though...

Aha!
Remove the remaining material with a big drill.
Note: the template was used on both sides. That way, the hole doesn't break out on the other side when you drill through. Also the mortise won't be wonky.
At this point we cut the tenons on to the cross beams. The shoulders and cheeks were both cut with a circular saw, then finished with a handsaw.
Considerable time was taken ensuring that the joints fit before...

Assembly!
Pictured above is the box frame being dry-fit. It is upside-down. Note the laps that will land on the posts when it is flipped over.

It fits.
Bevels on the through tenon offer a nice detail.

After glue is applied to the tenons, the box-frame is assembled. Be sure to check for square and twist.
Coming Soon...


